

Fixed-size path — Illustrated Step-by-Step Guide
A picture walkthrough of one feature: Fixed-size path on the Moving watermark tab. Use it when the watermark slides around the picture but keeps the same size.
Every screenshot below is the real program with a test video loaded; the red numbers match the notes under each picture.
What you are doing, in one paragraph
You park the video on a clear frame, draw one box around the watermark, tell the program how often to look, and it then finds that watermark wherever it travels — then paints it out in every frame. The box you draw is the size template, so the program keeps looking for a watermark of that size.
Step 1 — Load the video and pause on a clear frame
Open the folder or the file, press Play, slow it down with the speed box if you need to, and pause where the whole watermark is sharp and fully visible. Everything after this is based on the frame you are looking at now.
If the frame is blurry or the watermark is half off-screen, move a little and try again — this single choice matters more than any setting.
Step 2 — Go to the Moving watermark tab and click "Fixed-size path"
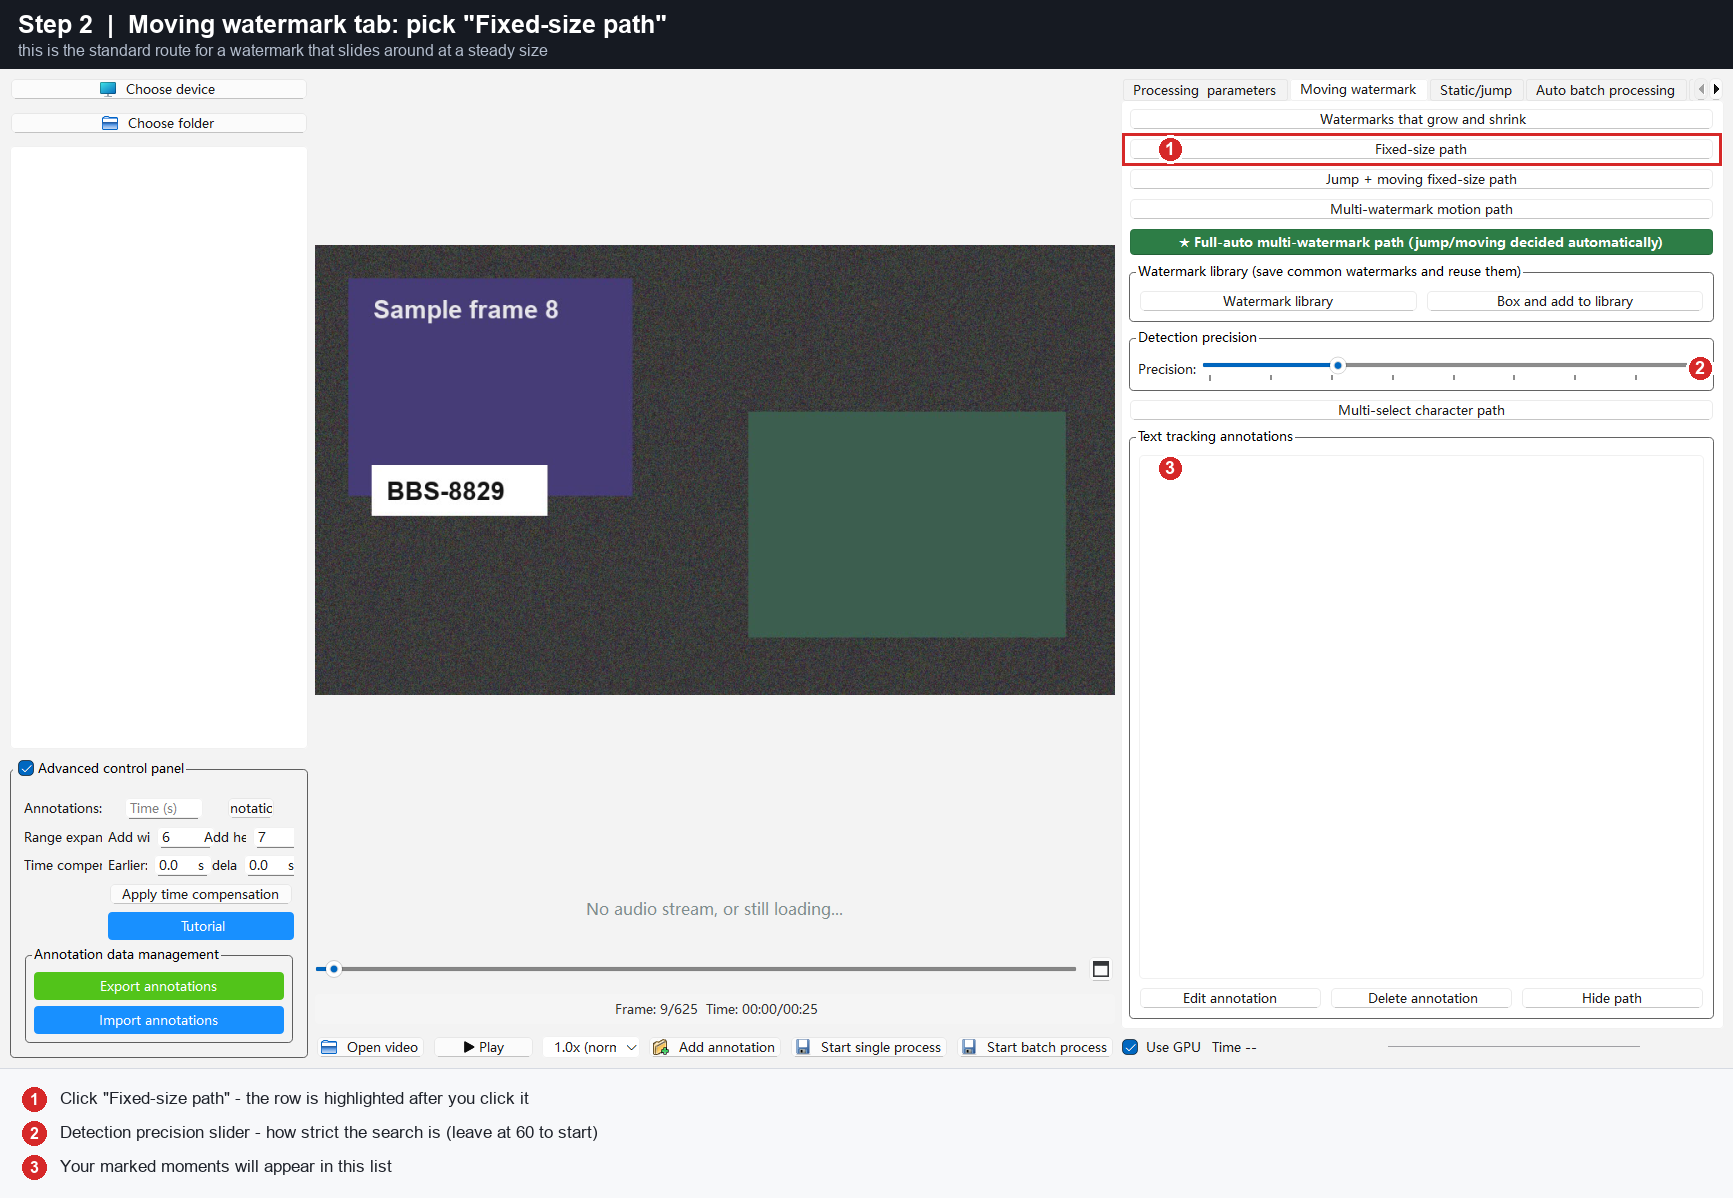
- 1 — Click "Fixed-size path". This is the standard route. The other three buttons on this tab are for different watermarks: one that changes size, one that jumps around, and one that has several watermarks moving at once.
- 2 — Detection precision. How strict the search is. Leave it where it is for your first run; lower it later if the watermark is missed.
- 3 — Your marked moments appear in this list once the program has gone through the video.
Step 3 — Read the short reminder
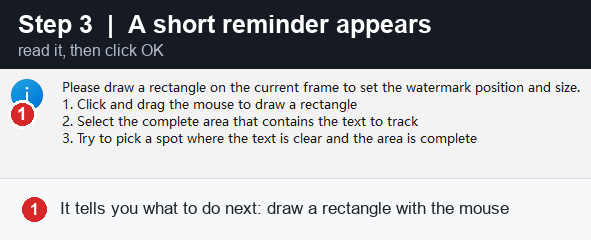
- 1 — It tells you exactly what to do next: draw a rectangle with the mouse. Click OK.
Step 4 — Draw the box
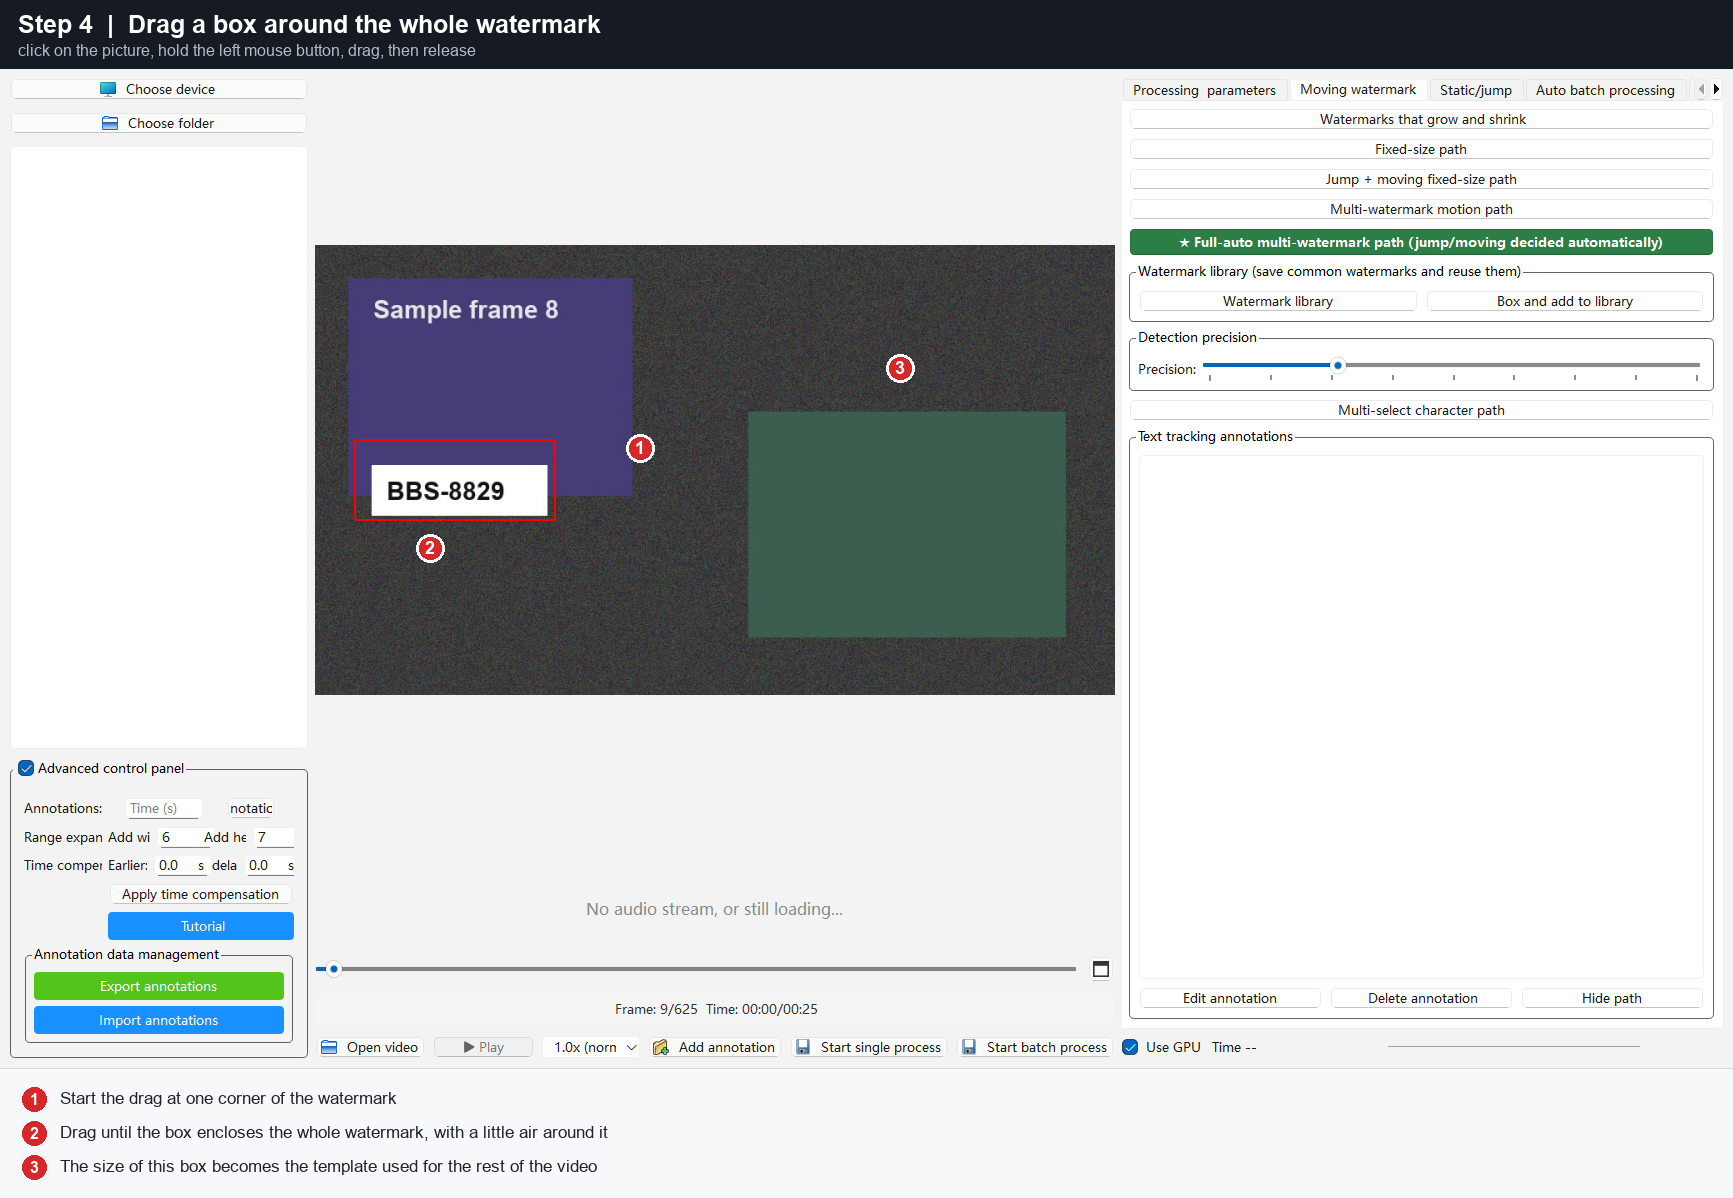
- 1 — Press the left mouse button at one corner of the watermark.
- 2 — Hold, drag, and release when the box encloses the whole watermark — add a little air on every side. Slightly too big is much better than slightly too small.
- 3 — That box becomes the size template for the whole video. The program now looks for the same watermark at that size, wherever it appears.
While drawing, playback is switched off so the frame cannot move under you.
Step 5 — Choose how often it should look
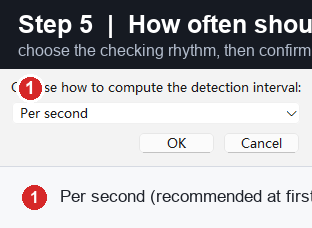
- 1 — Pick the rhythm.
- Per second — the default and the right choice for a slowly drifting watermark.
- Per frame — when the watermark moves quickly.
- Check every frame — the most thorough and the slowest; use it for stubborn watermarks.
Step 6 — Confirm the interval value
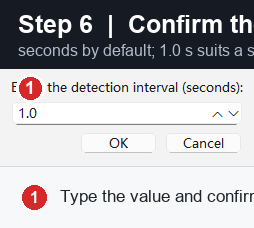
- 1 — Type the value and confirm. Smaller means more checking and more time; 1.0 second suits most slowly moving watermarks.
Step 7 — Confirm which text to follow
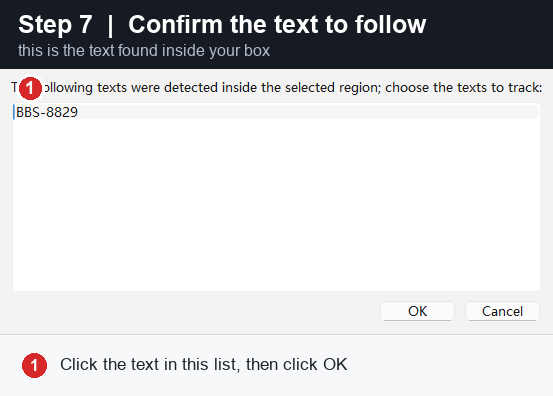
- 1 — This is the text the program found inside the box you drew. Click it and click OK. If the list is empty, the box missed the text — go back, draw it again a little larger.
Step 8 — Check the moments it found
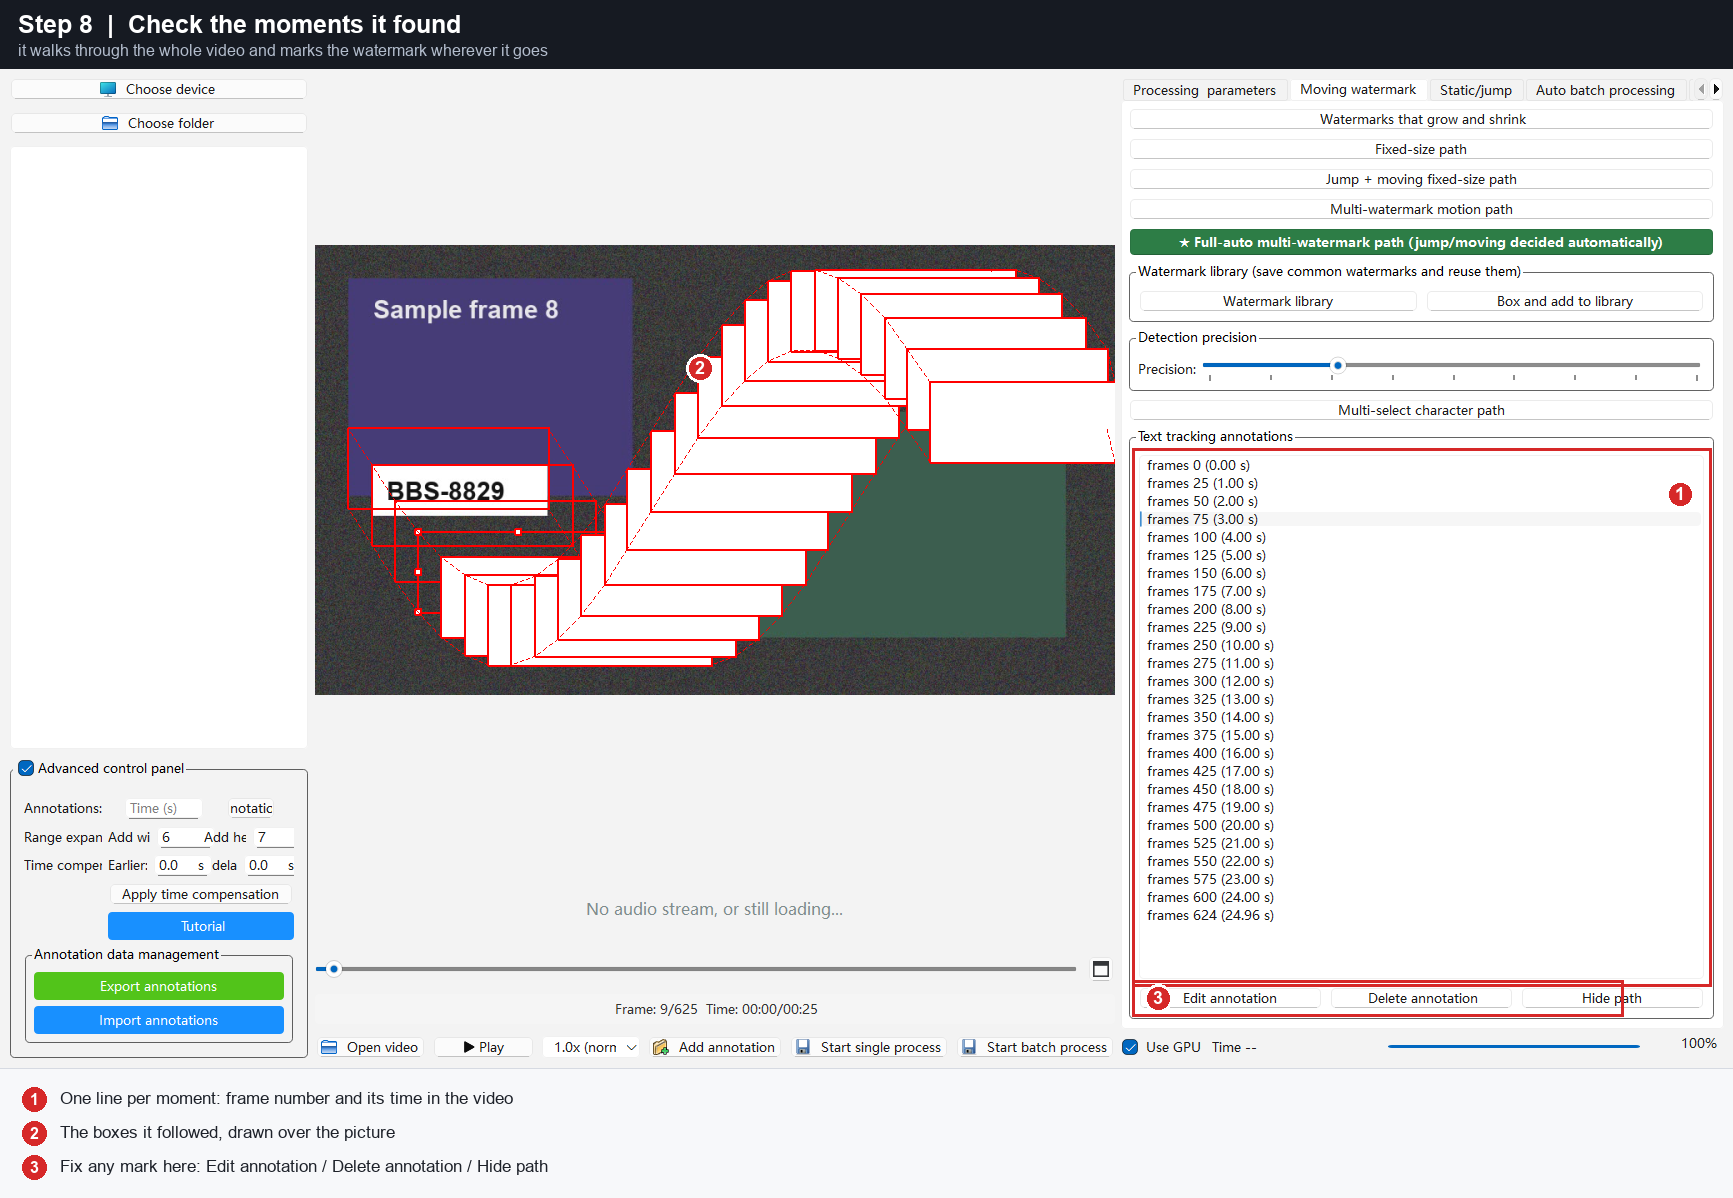
- 1 — One line per moment, with the frame number and the time in the video. Scroll the list to see how far through the video it got.
- 2 — The boxes it followed, drawn over the picture. Press Play to watch them track the watermark.
- 3 — Fix anything that is wrong: Edit annotation to reshape a box, Delete annotation to remove one, Hide path to hide the boxes so you can see the real picture.
If a moment is missing, park the playhead there, click Add annotation in the bottom toolbar, and draw the box yourself. To widen every box a little — for example when a sliver of the watermark still shows at the edge — use Add width and Add height in the Advanced control panel on the left and run again.
Step 9 — Let it start
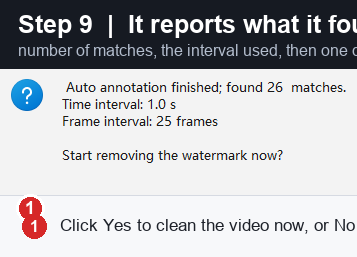
- 1 — It reports how many matches it found and asks one question. Choose Yes to clean the video now, or No if you want to look at the marks first — your marks are kept either way.
Step 10 — Choose how the watermark is removed
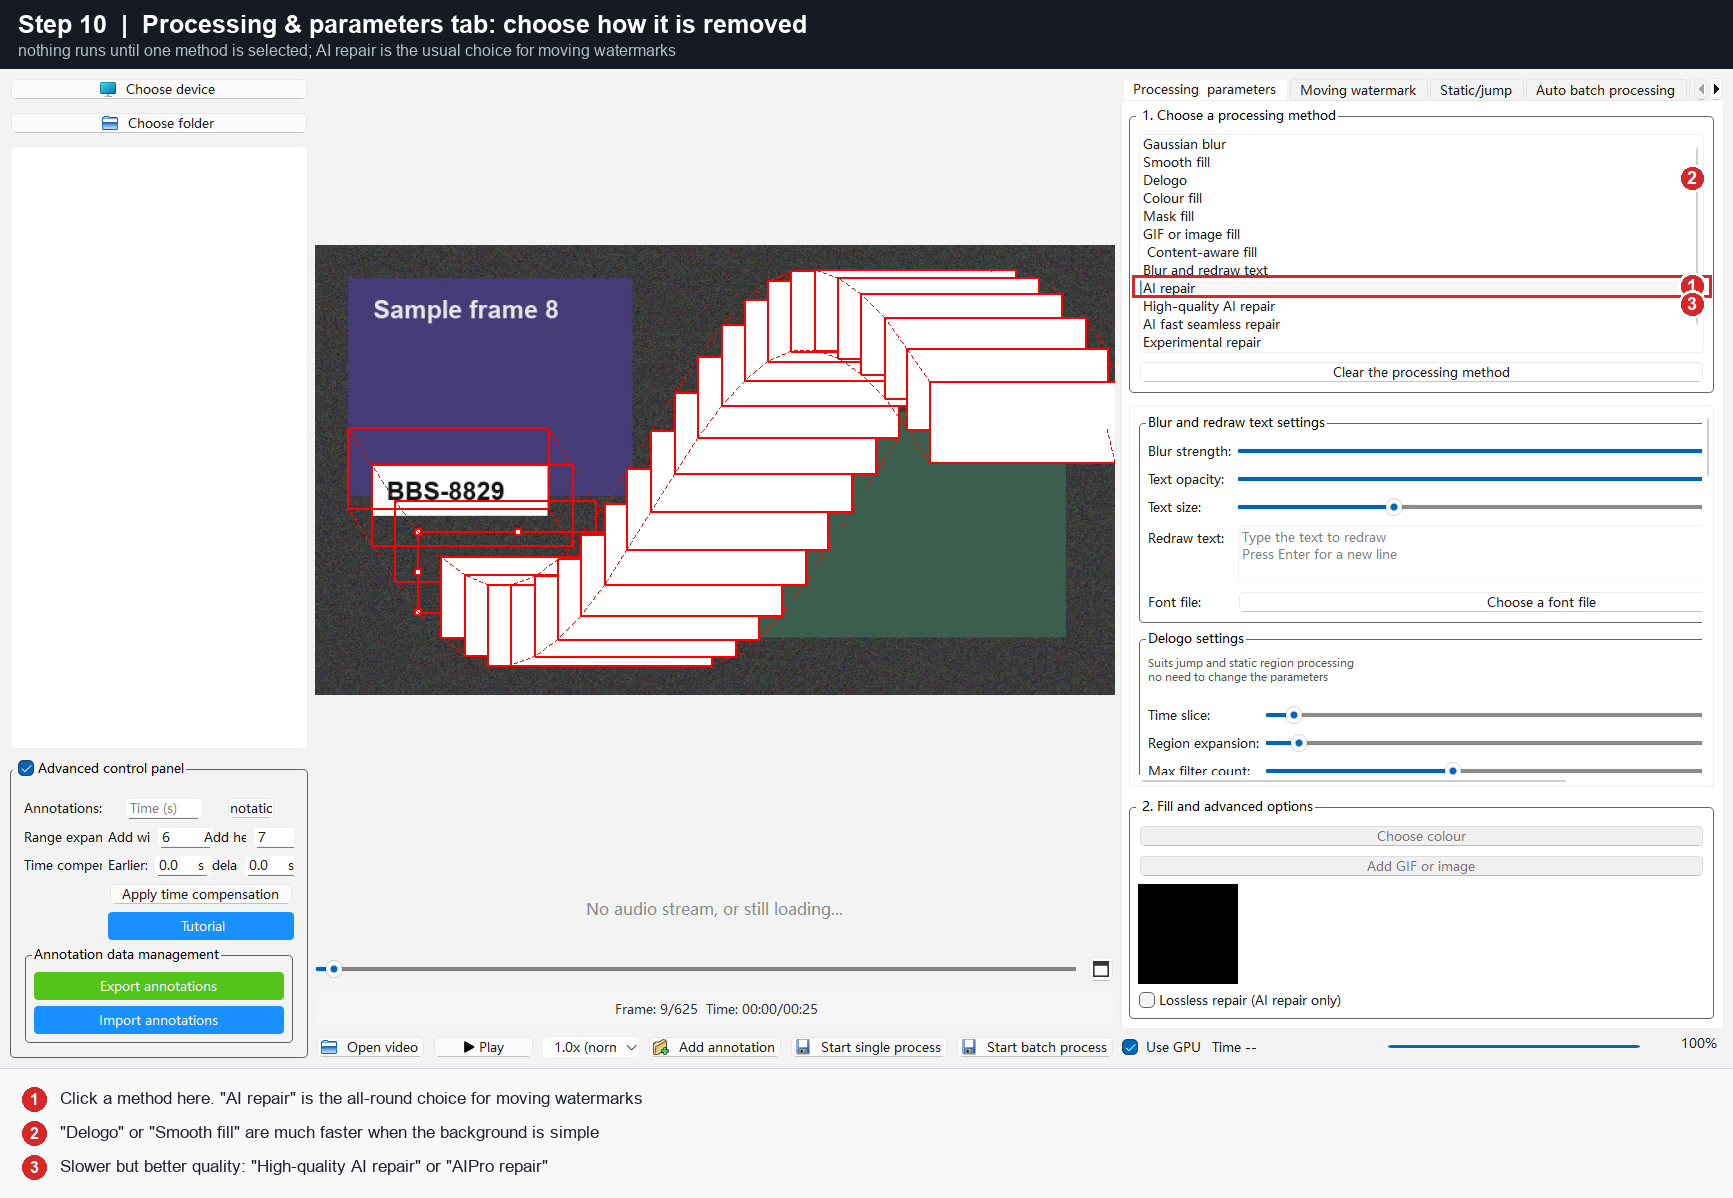
Go to the Processing & parameters tab — nothing can run until one method is selected here.
- 1 — "AI repair" is the all-round choice for a moving watermark.
- 2 — "Delogo" or "Smooth fill" are much faster when the watermark sits on a simple background.
- 3 — "High-quality AI repair" / "AIPro repair" give the best result when you have time to spare.
Step 11 — Say where the finished file goes
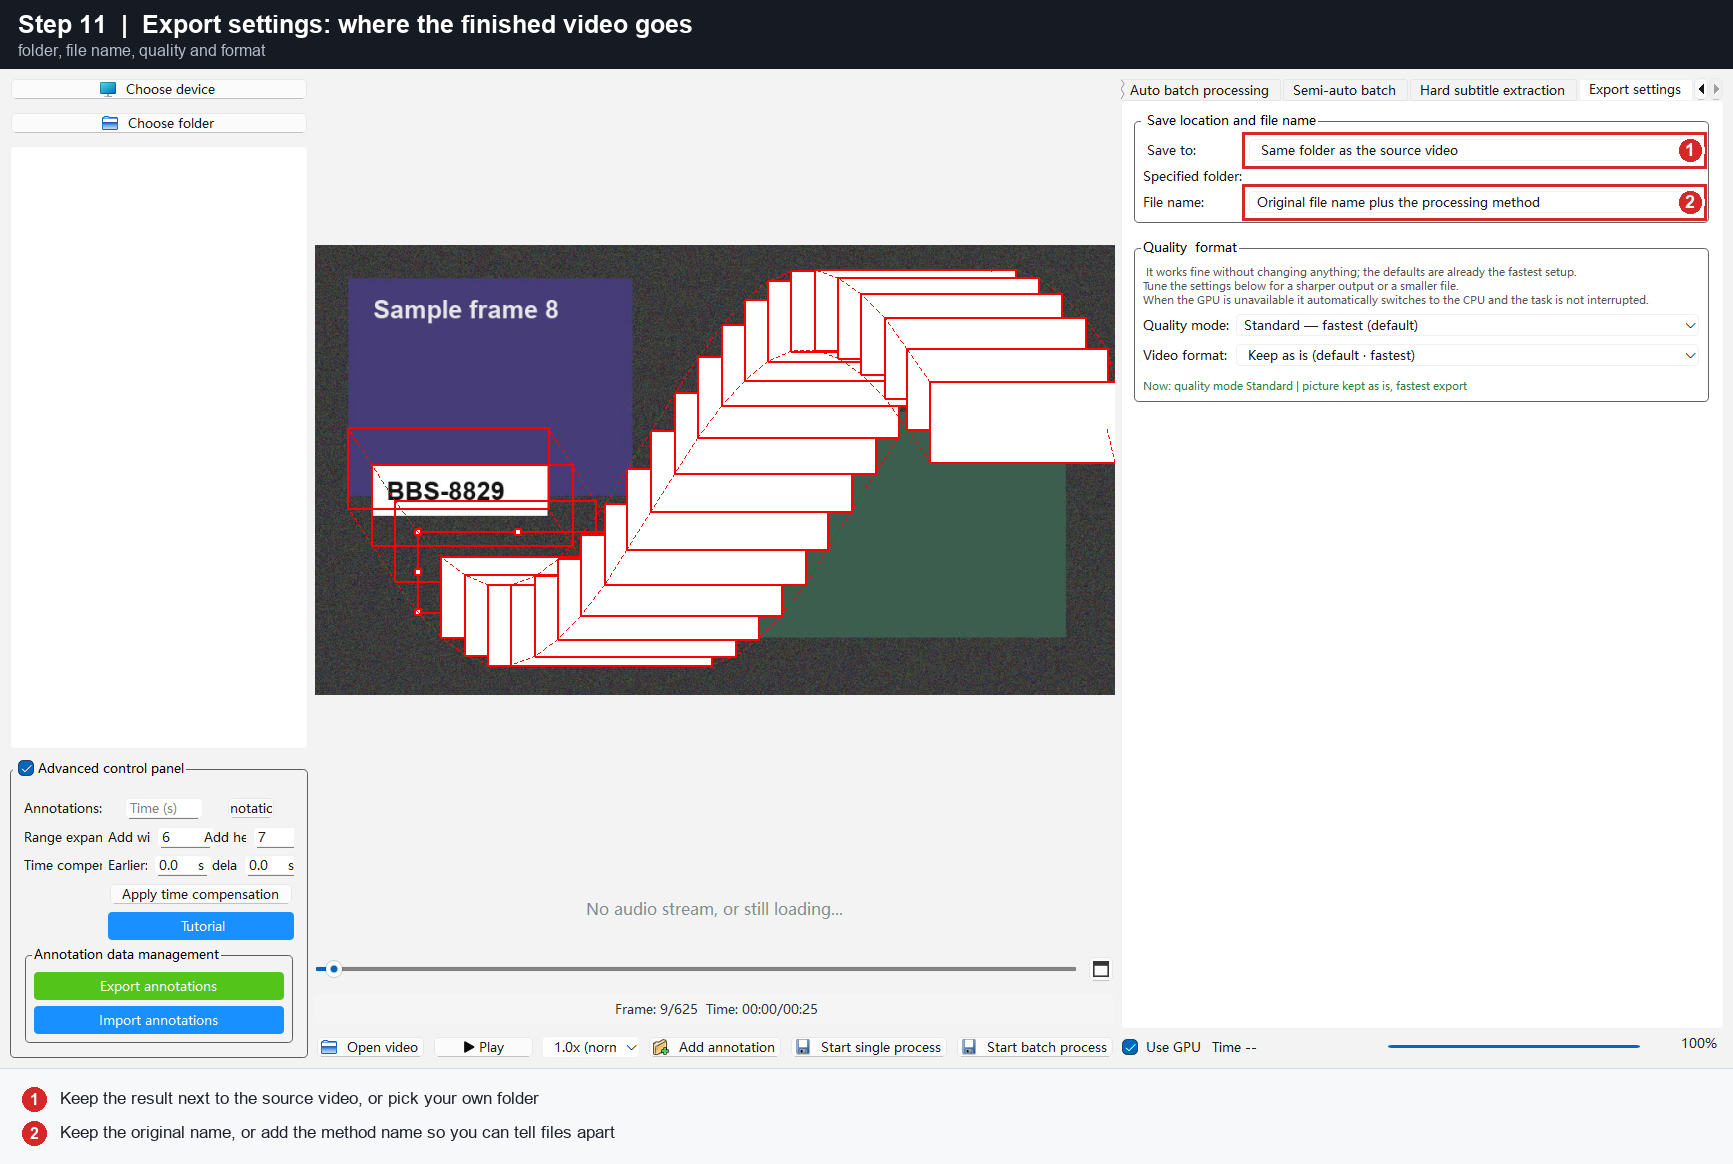
- 1 — Keep the result in the same folder as the source video, or choose your own folder.
- 2 — Keep the original name, or add the method name so you can tell cleaned files apart at a glance.
Step 12 — Run it

- 1 — Start single process cleans the video that is open.
- 2 — Use GPU — tick it when your computer has one; the job finishes sooner.
- 3 — Progress and the elapsed time are shown next to it. The finished file appears in the folder you chose in Step 11.
Quick recap
- Load the video, pause on a clear frame.
- Moving watermark tab → Fixed-size path.
- Draw a box around the whole watermark, with a little air around it.
- Choose the interval (Per second is fine to start).
- Confirm the text to follow.
- Check the marked moments; fix or add any that are wrong.
- Pick a method on Processing & parameters.
- Set Export settings, tick Use GPU, press Start single process.
If something goes wrong
| What you see | What to do |
|---|---|
| "No text was detected inside the selected region" | Move to a sharper frame and draw the box again, a bit larger. |
| Part of the watermark is still visible afterwards | Raise Add width / Add height in the Advanced control panel, then run again. |
| The start or the end of the video is not covered | Use Time compensation on the left and click Apply time compensation. |
| Moments in the middle are missing | Add them by hand with Add annotation, or re-run with Per frame. |
| Too slow | Choose Delogo or AI fast seamless repair, tick Use GPU, and use Per second instead of Check every frame. |
| A different watermark (or subtitles) got picked up | Use Box and add to library to save your watermark first, then run the fully automatic mode with "Using the watermarks ticked in the library". |
The other buttons on the same tab work the same way: box the watermark (or pick it from a list), choose the interval, check the marks, then run. Only the first click changes.
